Get Free Trial Week Developer Access, Try Before You Hire. Click Here to Claim Now

Sign In with Apple Integration in iOS App

In WWDC19, Apple revealed "Sign In with Apple", a new way for users to create accounts and sign in into iOS apps. Sign in with Apple provides a fast, private way to sign into apps and websites, giving people a consistent experience they can trust and the convenience of not having to remember multiple accounts and passwords. It reduces friction in the onboarding flow, which is great in terms of conversion and growth.
Apple has made Sign in With Apple mandatory, in case your app uses other third party login services (such as Facebook, Google, or Twitter sign in).
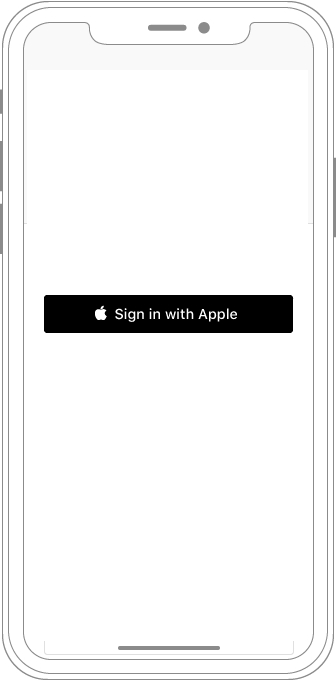
In this iOS tutorial, we are going to learn how to implement the ‘Sign in with Apple’ button in your iOS app.
CONFIGURATION PART
Step - 1: Create and configure Project
You can create a new project and set a development team in the Signing & Capabilities tab. In case, you've already created project and provisioning profile then ignore this.

Step - 2: Add “Sign in With Apple” Capability in Xcode.
Add the Sign In with Apple capability in your project. This will add an entitlement that lets your app use Sign In with Apple.

Step - 3. Add a New Key to Your Apple’s Developer Account
You will need to create an Auth Key with Sign In with Apple in your developer account.
Go to your Apple Developer Account → Certificates, Identifiers and Profiles → Key. Select add a new key option, here you can add the name of the key, check “Sign In With Apple” and press Configure button.

CODING PART - Add Sign in with Apple button in Swift Code
You need to import AuthenticationServices which is an Apple framework for handling authentication.
![]()
Then you will need to add code for creating a button using the ASAuthorizationAppleIDButton button:
We have given the button a target function, ‘signInButtonTapped‘, this will be called when the button is tapped. We will be requesting the user for Apple ID verification inside this function.

Here, we are first creating a request and in requestScopes asking the user for a “.email” scope. You can specify the scope as per your need.
We have initialized the ASAuthorizationController by passing in our request. To get the result of the verification, we will need to access the delegate functions via ASAuthorizationControllerDelegate protocol.
Next, we will add delegate protocol, which is ASAuthorizationControllerDelegate.
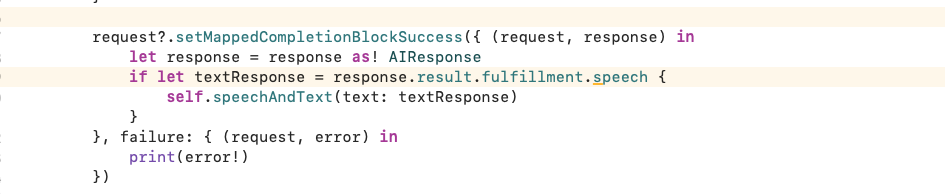
Once a user has successfully signed in, we are getting the user credentials inside authorizationController didCompleteWithAuthorization and checking if the credential is ASAuthorizationAppleIDCredential. After that, we are getting the properties from the returned user credentials.
After that we are showing user details in an alert. For demo purposes, you can save the information in UserDefaults, but for a more safe way, please use the Keychain or own secure server.
Please make sure to handle the didCompleteWithError method also, possible by showing an alert.
Now, it’s time to add the code for the second delegate protocol, that is ASAuthorizationControllerPresentationContextProviding. Here, we are telling the app to show the authorization view on a particular window.

So, this is basically it, the user has created a new account and you have access to the user's email and other requested information.
Next, we can check about getting the state of the user credentials, i.e. check if credentials are still authorized or have they been revoked. It can be done in AppDelegate or SceneDelegate, depending if you are using Storyboards or programmatically displaying the rootViewController. When the app is launched, we can check if the user is logged in or not and redirect the user to the appropriate initial view controller. Sample source code is provided below,
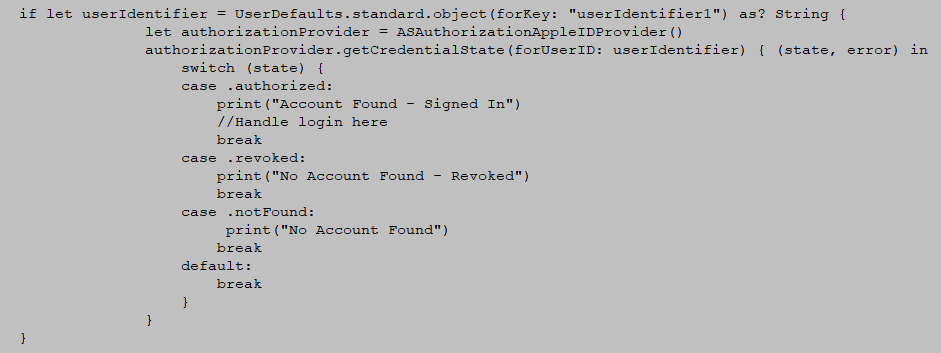
Here, we are fetching the ‘userIdentifier’ string from UserDefaults and then using the getCredentialState method to get the state. We will get the response with two parameters, that are named as ‘state‘ and ‘error‘.
We can get status using the ‘state’ and check if it is authorized, revoked or notFound. If it is authorized, you can present the user logged in view, otherwise you can present the login view and ask the user to log in again.
You can check our demo app’s source code here:
https://github.com/manekdilip/SignInWithApple_iOS---Swift
Conclusion
Most of the iOS apps use third party log in services (Facebook, Google, Twitter, etc.). As Apple has made the Sign in With Apple compulsory, they have to also add a Sign in with Apple button. You can also read Apple’s official guidelines (https://developer.apple.com/app-store/review/guidelines/#sign-in-with-apple).
Our iOS developers are always up to date with latest trends and releases in iOS app development. You can choose our iPhone app developers from a pool of talents on-board and hire for your business needs and we will get you an outstanding iOS application.
![How to Patent an App Idea in 2024? [A Complete Guide]](https://mt.dev-project-server.com/storage/blog/image/1699424466.webp)


Subscribe to Our Newsletter!
Join us to stay updated with our latest blog updates, marketing tips, service tips, trends, news and announcements!


